In this post, I’ll be giving you the details on how you can complete a project like this. It doesn’t matter what you’re working on because you can take the foundational bodywork application steps and apply them to any job that you’re working on. So for instance, we’re going to cover the safety, the tools that you’re going to be needing and we are going to put a two-tone paint job on this project. Get the FREE Auto Body & Paint Manual here. Also, don’t forget to LIKE, SUBSCRIBE and CLICK the notification🔔on my YT channel to get updates for more upcoming videos.
⛏️🔍The Basic Tools you need:
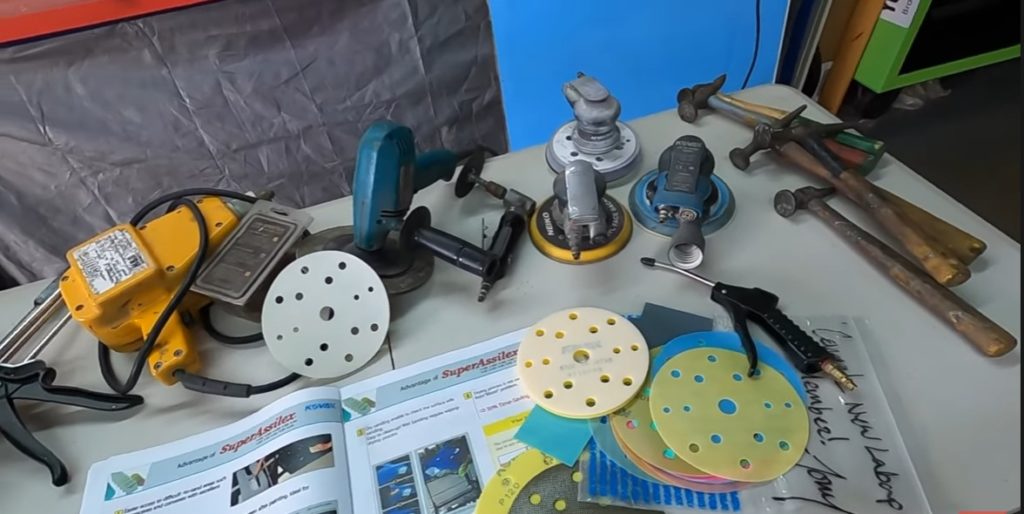
- Set of Body Hammers
- DA or Dual Action Sanders
- Inner surface pad
- Sandpapers
- Blower
- Grinder
- Uni-Spotter
- Pull Hammer
- Blocks
- Long Strand Fiberglass Body Filler (for the big hole on the top of the van)
- Spray Gun
- Body FIller
- Spreaders
- Glaze Putty
- Paints


✅The first thing to do when starting any project is to make sure that the project is clean.
📌So I highly recommend using a good carwash with no wax in it, that you don’t want any type of additives in it. You just want a regular degreasing carwash. What’s good is a little bit of “Dawn dishwashing soap” and a bucket, not too much, and that’s a perfect degreasing wash to wash down your project to take out the oils and just crap what’s in the paint, especially on old cars.
✅Wash the rims and the tires.
✅Mark the areas where you need to do bodywork.
✅Grinding the big and small dent spots
✅Use 80 grit to scuff around the area so body filler will adhere
✅Sand the paint off with 80 grit
✅Grind the big hole and the small rust hole on the roof
KEEP IN MIND: The way you tackle a project depends on your end goal. Now if this is going to be a sentimental project of yours, you might want to cut the rust hole out and spot weld a new piece of sheet metal in here.
But in this instance, this is an old work van. So we’re just going to patch it with fiberglass. What I normally do if I’m going to patch with sheet metal is atleast you want to kill the rust. You could use a naval jelly (look for any Rust Inhibitor/ Naval Jelly).
After you grind it like this, you just tap it on easy. And then you scuff it with 80 grit and then you could do your patching, welding, fiberglass, or your body filler straight off.
So before doing any type of filling, you want to make sure you tap it down so that you have a little area that it can fill. After that, you could put the filler on it and then blockage straight. You can treat it from the backside with undercoating, that’s recommended.
if you want to learn how to sheet metal and spot weld, we have videos in VIP at learnautobodyandpaint.com that actually show you sheet metal patches over holes.
✅Applying Body Filler
- Be sure to mix all fillers well before use
- When doing any type of body filler is you’re gonna put about 6-8 drops of hardener per golf ball size of body filler or the “Kitty Hair (Everocat Kitty Hair Long Strand Fiberglass Reinforced Filler)”. You just gonna have to work faster, so you could put 12-15 drops if you want. Just gonna have to lay down quicker because it’s just going to dry a lot. It’s okay to put more than not enough because if you don’t put enough hardener in it, then you’re going to be really playing with yourself for a while. If doesn’t, sometimes it won’t even tack up and you’re just gonna have to remove it.
✅Pulling out dents
Watch the full video for the actual auto body work on this Van project Part 1: https://youtu.be/T11x2Jht5fQ

🌐FOR MORE HELPFUL LINKS🌐
How To Repair Rust On Your Car Or Truck? Orange Peel Repair and More Autobody Q&A
Spraying Candy Paint Over Flakes, Sanding Tips, What Primer To Use, And More Autobody Q&A
How To Prep A Car For Primer, Sealer, And Paint: Custom Painting Tips || Q&A
Live Autobody Work On The Good Van Project “DIY” and Auto Body Q&A😎🚘
DO THIS! Spraying CAKED UP 2K Primer on RAW Plastic and Epoxy Primer

