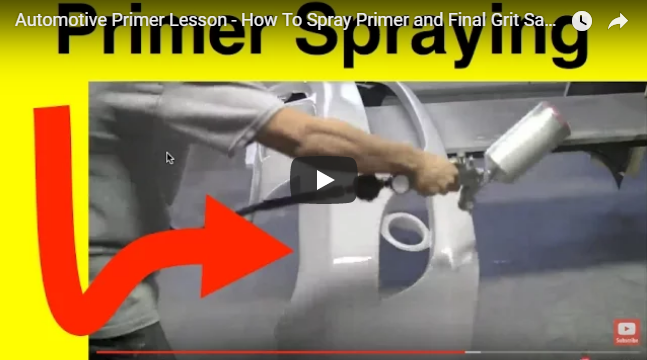
Hey, it’s Tony. Thanks for watching the video and checking out the blog. Today, we’ll talk about spraying a filler primer over a BMW body kit.
In the video, you can see I’ve prepared mostly everything. All the panels are tacked down and ready to roll.
We have our gun and our filter in it. You always want to filter everything you do. We also have our jar to mix. Remember, your hands are going to be sticky sometimes.
And, we can put back our tack rag and use it when we’re doing our base coat clear coat. We’ll use an area on it that wasn’t used. You can probably do a whole car between your base coat stages before you throw it out.
I totally forgot that I have a can of primer. I already stirred this up for a good ten minutes. Let’s mix it a little bit more. We also have our hardener. Make sure to stir everything and filter everything up before you start.
It’s a 4:1 mixture which means 4 cups of primer and 1 cup of activator. You can eyeball it. If you’re not comfortable with it, you can measure it out with yogurt cup or basic paint cup.
Watch the video as I show you how to mix it in the jar. I half-filled it with primer (or probably a little less), a quarter of our hardener and we can add some reducer if it looks a little bit too thick.
Then, mix it up really well and let it sit for about fifteen minutes so your chemicals would react with each other. This is called the sitting time.
Make sure to strain everything before you put it in your paint gun. Then, watch the video as I show you how to lay the first coat of paint.
We’ll put two to three heavy coats of primer. I’m spraying at about twenty to twenty two pounds of pressure.
It shouldn’t be too much because you want it to flow on thick and heavy. And, if you spray a thick primer at too much of a high psi, it’s going to come out dry since it will come out so quick.
You’re not going to get a nice thick wet coat like you see in the video. The average is 18-22 psi when spraying thick euro primer. It’s a 2K primer like you see in the video.
Please take note of how I spray, how my wrist flows and how I get on to certain areas. I’ll do the front and back kit two to three times.
If you look on to the top left part of the bumper cover where the light goes, you can see a little dry area. That’s the bondo sucking up the primer. You’re going to see these spots all over when you start painting.
You just need to cover it up and give it another coat. You don’t want to finish it off that way. You have to make sure that it’s all thick and filled up.
It’s good that you notice these spots because you know where the bondo is sucking up the primer so you can cover it.
Here’s a sneak peak of the finished product. This is how it’s going to look once it’s done. When it dries, it should look pretty much like a matte color.
All the imperfections that you see here, like the dust and orange peel, will be sanded out flat. This is our first coat. We’re going to do another coat then we’ll clean our spray gun.
Okay so let’s go ahead and clean our spray gun. This is the basic conventional spray gun. We don’t have the DeKups system from DeVilbiss and all the other good stuff.
When you clean your gun, just throw some lacquer thinner in it immediately after you paint then mix it up.
Notice that I was pulling the trigger when I was pouring the paint out of the cup. You have to squeeze the trigger to make sure that everything comes out.
You have to repeat the process about two to three times. Then, take cup off, as well as the nozzle tip, and needle then soak it in the little bucket. Soak it for a little while.
Make sure you clean it out really well then put it back together. You don’t have to worry because soaking will not hurt any of the seals.
Sometimes, I throw in a little bit of lacquer thinner in the spray gun to let it sit. Please watch the video as I make a demo in cleaning the gun. I just included this because we’re going through the whole body kit painting series.
I have other videos on tips and tricks in cleaning your spray guns within the LearnAutoBodyAndPaint VIP Course. So, if you want to learn more, check it out now.
Don’t forget to grab your FREE 85-Page Auto Body And Paint Manual and get a lot of free information about DIY auto body work.
I hope you liked the video. Please Like, Comment, Share and Subscribe to my videos. Stay tuned for the next video as we assess what we’ve primed and we’ll also talk about glaze putty.
Talk soon! Cheers! Bye!
-Tony
Other Helpful Links:
Secrets To Spraying Silver Basecoat Plus Tacking Tips When Painting
2000 BMW Z3 M – New Touch-up Project
Learn Auto Body – BMW Body Kit Body Work Process – Part 8 – Bondo Shaping and Sand Paper Grits
How To Inspect A Car For Body Damage | Telltale Signs a Car Was Painted or Was in a Collision
Automotive Spray Guns – SATA, Iwata, CP, DeVilbiss or a Warwick – Best Bang for Buck?
