Hey, what’s goin’ on!
I haven’t been posting videos lately. I have just been really busy, with family visiting from New York and Japan and other stuff.
Now I am definitely back and I’ll show you the bike project that will be uploaded to the VIP course in just a bit.
Let me show you the bike.
Here it’s looking pretty cool. I did a complete frame-off restoration. I just put the motor in yesterday. Don’t worry because I have everything on video, showing most of the bodywork and painting.
We did the frame in black satin. It’s not really super shiny. It’s a satin flat black, kind of hot rod black as they call it. It has like a satin sheen to it.
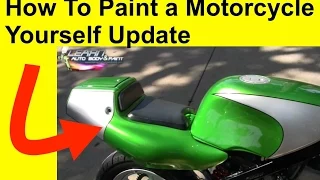
We did the rim in two-tone. We did rainbow flake in silver and then of course, the Camaro Green.
We did a two-tone graphic on the tank and the back in the same colors.
The thing came out awesome! It looks really cool.
So remember, just check out the VIP course after watching the video. I’m giving away a FREE 85-Page Auto Body And Paint Manual as well as a FREE 90-Minute Auto Body And Paint DVD
…so you can bang out any kind of project that you’re working on.
That includes how to paint a motorcycle, a classic, refrigerator or any appliances and furniture you want to restore.
Whatever you’re doing, I’ll show you exactly how I do all this.
I also show how to fix the mistakes. Some things happen when you paint and you’re going to go through some hard times but I’ll show you exactly how to fix it. If you can see on the video, a little bug landed on the tank while it was not yet completely dry. So I took most of it out and really laid the clear coat well on the area. It will easily be color-sanded and buffed out. And I’ll make sure to capture everything on video.
I added silver flake in the Camaro Green on the tank. You can see it well under the light of the sun.
I can’t wait to put it together!
Of course I still have to put the gas grip, switches, front brake, front fender and fairings. It’s all painted, I show you all of it inside the shop. I used a flat green color on the inside, you don’t want to leave out those parts.
That’s about it. This is just a quick overview on this latest project from the LABAP Headquarters.
Thanks for watching the video. Man, I can’t wait to show you this project’s complete step by step.
I also put my signature on the side of the tank, looks pretty cool. 🙂
Let me know what you think in the comments below. I’d love to hear from you guys.
Cheers!
– Tony
Other Helpful Links:
Get A Free 90 Minute Auto Body DVD Here
How To Plan Your Auto Painting Project
Warick Spray Gun Review (what we use to paint at LABAP)
