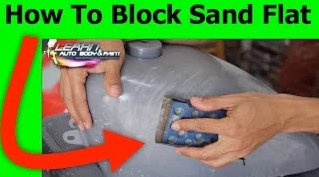
In this video, I’ll show you how to guide coat and block sand spot putty to fix small dents.
When I was sanding this primer out flat, I saw a little dimple on the tank. At first, I couldn’t find it. So I went ahead put a guide coat on and block-sanded it dry with a 400-grit sandpaper. Then I put glaze putty (spot putty) and filled up the low spot.
They now have carbon guide coat. It’s in powder form. You just put it on, wipe it on and it stays on. It’s pretty cool. I’ll show you some of that stuff on the next videos.
So we block-sanded it flat and saw the dent.
I use the tip of a sandpaper to gouge it in, sanded it again. That’s where we put the glaze putty.
Using a putty knife, I dabbed the glaze putty on the spot, just filling it in.
You can use your finger to put putty on those hard to get areas like the round edges.
We won’t worry about the bare metal spot because we will still wet sand the whole tank one last time and then re-prime it. I can mix up some 2K primer and just do the whole thing or you could get some high-build 1K primer (those in can) and just hit those spots quickly, let it dry and then scuff it down with a 400-grit sandpaper. Then you’re ready for paint.
After putting some glaze putty over the dent, I just block-sanded it with a 400-grit sandpaper.
You don’t want to go too deep or you’ll take it all out again. It came out looking pretty good.
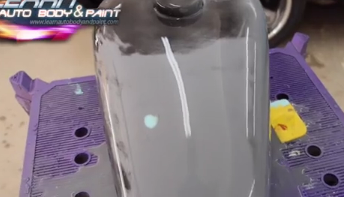
After wet sanding, you could see how smooth it looks. You can even see the reflection of the ceiling on it. This is basically how your clear coat is going to look on the finished product.
Also, if you see orange peel at this stage, just keep block-sanding until it comes out like glass. See how nice that looks?
So now you get the idea. We show you the rest inside our VIP Course.
We’ll keep sanding the whole tank out. If you have any spots, put glaze putty in the area. Like I said, you could also put 1K primer with a spray can. But if you want to and you’re mixing some up, you could spray some 2K primer back over it and then hit those spots again.
You want the whole thing grey (in one color), before you start applying base coat.
We’re not yet doing it this time, but we’ll be using black base coat.
Hope you enjoyed the tip! 🙂
To learn more about auto body and paint and how you can apply these same strategies in your home garage and in your workshop…check out the LearnAutoBodyAndPaint VIP Training Course right now. I’m giving away a FREE 85-page Auto Body Manual plus a FREE 90-minute Auto Body and Paint DVD.
I show you a lot of information in that DVD, just help me with shipping and tell me where to send it.
I’ll talk to you soon!
– Tony
Other Helpful Links:
Limited Offer: Free 90 Min Auto Body DVD
How To Plan Your Auto Painting Project
Warwick Spray Gun Review (what we use to paint at LABAP)


I’ll try these techniques that you showed me Tony. I have a cottage to work out of, it’s the only place that I can try these things you’ve showed me. Thanks! Bobby from Canada.
That is awesome Bobby, keep us posted ok 🙂
Thanks so much for your tips Tony, we just need that little bit of help to get the edge!
No problem! Glad you like the information 🙂