Collision Repair: How to Straighten Auto Body Panels Using Our 6-Step Process
One likely reason you will have to do paint work on your car will be the result of a minor panel dent, such as on a wing.
One option would be to hire an auto body shop to take care of the collision repair for you. However, you may have to wait longer than anticipated to get your car back depending upon the shop’s schedule.
It may also cost you more than what you want to personally spend or claim from your insurance company, the work may not turn out as well as you had hoped or all of these outcomes.
Unless you damaged your vehicle beyond all means of collision repair, it is very likely that you can make the repairs on your own. Since you are reading this web page, you must at least have some degree of enthusiasm to give it a go, yes?
Don’t worry if your straightening skills aren’t the best, you can still do a satisfactory job. Deeper dents will simply require more layers of filler.
It’s important to mention at this point that you can’t apply a single thick layer of body filler in any one application.
Slightly damaged auto body panels can be straightened.
Auto body panels damaged beyond your collision repair skills can be replaced.
Either way there is a solution open to you.
The tools you will need are… The basic tools for doing bodywork include:
- An Air File
- A DA (Dual-Action) Sander
- Small Grinder
- Dead Blow Hammer
- Body Hammer
- Sandpaper
- A Pry Bar
The best way to learn how to use these tools is to simply pick them up and start using them, so don’t be shy. Experience will come with trial and error. Since the panel is already damaged, why not use it to practice on?
Straightening a Panel
Firstly, before you begin straightening a panel that was damaged during a collision, you must determine the original point of impact. There are two areas of damage to any panel involved in a collision:
- The damage suffered from the actual impact.
- The damage that occurs from reaction forces.
Let me explain what I mean by reaction forces in simple terms using a straight forward example: Since a door is basically secured by its mounting points, an impact to the middle of the door would cause the panel to separate itself from its mounting points.
This is the reason why vehicle passengers who have been involved in a side impact, often have trouble opening the door to get out.
The Process of Straightening a Panel
The process of straightening a panel involves reversing the dent until the panel is as close to its original shape as possible. It is certainly much more complex than simply hammering the dent out from the opposite side.
Instead you must work from the outer perimeter of the damaged area towards the point of impact. This can be a little tricky if there is more than one area of impact on the same panel but the process is still the same.
It is quite common for a dent in one portion of a panel to cause another area on the same panel to bulge outward. Start by hammering this outward bulged area back into the correct alignment before you start hammering the actual dented area back into place.
If you attempt to straighten the dent first it will cause the metal in the bulged area to stretch.
Working with Body Filler means you don’t need to be perfect
Aim to straighten the panel to within 1/16 of an inch of its original form. You can then use a thin layer of body filler to cover up any remaining imperfections.
Unless you are able to metal finish the panel without using any filler, the repaired area needs to be left slightly lower than the undamaged area surrounding it.
This is done to keep the body filler from building up above the surrounding area.
Never apply body filler at more than 1/8 inch thick at its deepest point. Doing so will result in the filler either sagging or cracking.

How to Straighten a Panel
The following is a 6-Step method to help you repair those dents in no time at all.
- You will first need to pull out the dent in the sheet metal in order to straighten it. This is made easier if you temporarily weld small metal rods to the damaged sheet metal using a Rospot or a stud gun. The rods should measure approx 1/8 inch in diameter and 2.5 inches long.
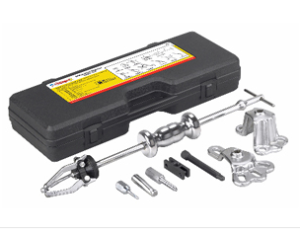
- Using a slide hammer, slip it over the rods one at a time. You can then hammer out the dent using the slide to return the sheet metal back to its original position. You may need to tap the sheet metal back in a little if you accidentally hammer it out too far.

The slide hammer is then moved over to the next rod where it is again hammered out to undo the effects of the impact. It does take practice to read the dents and know exactly where to apply the right amount of pressure.
- As you progress, check your work. You need to ensure every part of the panel is as close to its original shape as possible. You also don’t want any portions of the panel to be too high.
Any high spots will need to be hammered back down into place and any low spots will need to be filled.
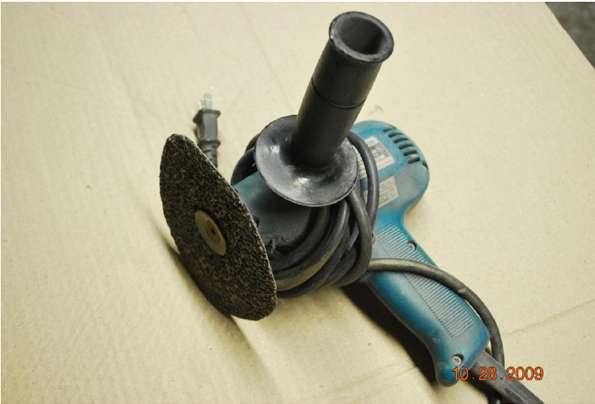
- After all the pulling is done the rods can be cut off as close to the body as possible. You can accomplish this using a pair of diagonal cutters. The remaining stubs are easy to grind down using a coarse sanding disc and a grinder.
- Next you will need to smooth the surface using body filler. After that add a light coat of glazing putty for the final surface.
A mixing board has a tablet of disposable sheets for use when mixing filler or glaze. The filler would be mixed upon the sheet and then applied, the sheet would then be torn off and thrown away.
Don’t worry about any slight high spots; they can easily be guided back into place with the use of a small hammer.
You will find that older vehicles have thicker sheet metal compared with newer modern day vehicles; which have auto body panels that are a lot thinner and more flexible. Adjust the amount of effort you use to straighten the panel depending on the age of the vehicle.
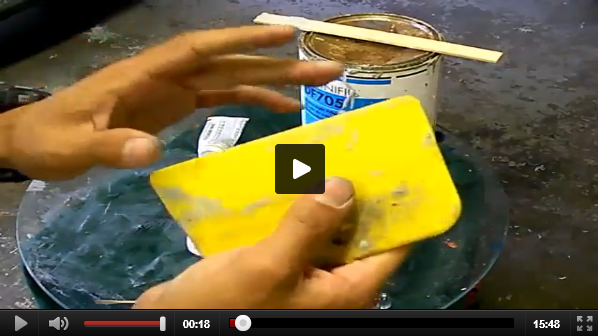
- Use a flexible spreader to carefully apply the filler to any low spots. Be careful to prevent air bubbles from forming. After the filler hardens it can then be sanded and shaped, starting with 80-grit sandpaper.
I hope you liked this blog. Talk soon! Cheers!
-Tony.
Did you enjoy the blog? Check out the LABAP VIP course that will help turn you into an auto body and paint pro, from home!
Other Helpful Links:
Learn How To Choose A New Car Paint Color Using Paint Color Chips And Automotive Paint Codes
HVLP Spray Guns – The Things To Consider When Purchasing A Spray Paint Gun
Painting Auto Body Panels And Blending Paint


Thanks for the advice about how the amount of effort can affect the mounting of a car body panel. Recently, I got involved in a minor car accident, which led to multiple scratches to my new Mitsubishi Mirage. I think that I should consider bringing my car to the nearest and most affordable car body repair shop to allow professionals to inspect and apply the right amount of pressure on my car at a minimal cost since I need to save up for the oil change in the next few months.
10 steps of straightening
Thanks for checking out the blog!
name 10 steps used for straightening