What’s up, guys! Tony here from LearnAutoBodyandPaint.com and Paradice Garage. This video might help you at “Prepping (Semi Pitted) Aluminum Rims for Primer”. By the way, don’t forget to LIKE and SUBSCRIBE to my YT channel for more videos about our Honda Grom Project and get great information to help you with your own custom painting! And also, check out the LearnAutoBodyAndPaint VIP Program to learn more about DIY auto bodywork and paint.
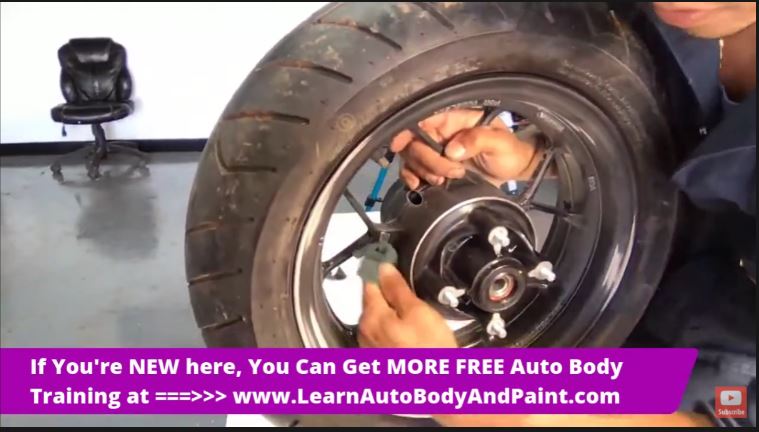
So we’re prepping these motorcycle rims (Honda Grom) because we’re gonna be priming and painting them. They’re going to be a Candy Gold Rim.
This is a stock Honda Grom Aluminum Rim. We had pitting and some aluminum bubbling and corrosion which we started taking care of like on the edges here.
I don’t normally like to use this (3m scotch brite), not for any type of panel prep but when you’re working on rims like this or you getting in little grooves that you gotta scuff up. It’s an alternative to like 400 to 500 grit, these things work great.
What you have to do is just get in there (rim) and scuff it up. You can get into every little nook and cranny with it. But it won’t take out heavy-duty corrosion like we had to do so.
I was using another little pad just the foam pad with 240 grit. I could go probably a 150 or a 180. But I had 240 and this is good sandpaper and I figured it worked out well.
So I was using just a 240 to basically get into areas like this here and just sand out all the corrosion and get it down the metal and feather it out.
You always want to see things feathered. You don’t want to have ridges where you can feel it and you feel the paint ridge, always want to have it feathered and then after that, you’re good for primer.
Just got to scuff it up a little bit more. I’ll mask the tire off and deflate the tire a little bit and get it ready for primer and paint.
Hit it with wet sand in all the areas. Maybe dry sand first and then finish with wet sand and then proceed to paint.
And pretty much it. That’s what I wanted to talk to you about guys and give you some tips. Hopefully, that helped!
I will probably pop on a lot during the next couple of weeks because we’re gonna be banging out a ton of stuff.
Talk to you guys soon! Have a great week!
-Tony
For more helpful links:
Prepping Car for Repainting – Sanding and Priming: AutoBody Q&A and A Quick Tour at Paradice Garage
When to use 2k Primer and Epoxy Primer: Autobody Q&A
The Three (3) Ways to SAND: Wet Sanding VS Dry Sanding Plastic Parts – The Pros and Cons!


very glad to read this article because I have a question to ask like you people can remove scratches on car by painting it?
Hi John! join me on my live streams so we can talk about your questions 🚗👍 https://www.youtube.com/channel/UCPpo9YgJsEwoN0nB-VTF7Tw Paradice Garage Live 8PM EST
Nice Blog, here shared good information about your blog, Blog really helpful for us. Thanks for such a wonderful post. Continue posting like this.
Thank you, Peter! Your feedback matters to us. Just keep following my Blog for new content that might help you with your AutoBody and Paint Projects 🙂